NSX Advanced Load Balancer Installation and Configuration Series – Part 2

Welcome to Part 2 of the installation and configuration series. This post will guide you on how to create NSX ALB cluster and how to configure backup.
Create NSX ALB Cluster
Overview
Controller may be deployed as a standalone, but to ensure complete system redundancy it must be highly available by adding two additional controllers to create a 3-node NSX ALB Controller cluster.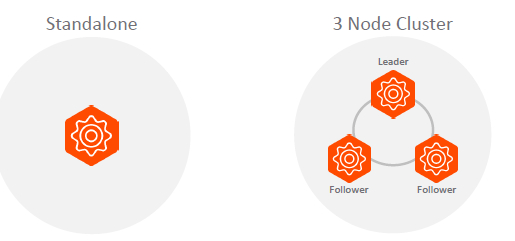
Inside the cluster there is a mechanism (Zookeeper-like model) to make sure we have a one leader and two followers. All Controllers are active, and management may be performed from any Controller in the cluster without knowledge of which is leader, and all intra-Avi communication is encrypted.
Controller High Availability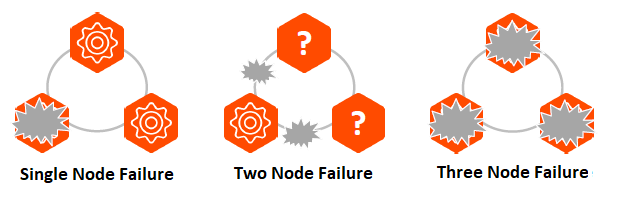
- Single Node Failure
- No impact to data plane (Service Engines) or management.
- Two Node Failure
- The remaining Controller node will not take over as active without quorum (2 nodes).
- Remaining Controller must be manually promoted to own the cluster and be active.
- Three Node Failure
- Service Engines will continue to run in headless mode and buffer metrics and logs until Controllers are restored.
- Configuration changes isn’t possible until Controllers are restored or redeployed.
Step-By-Step Procedure
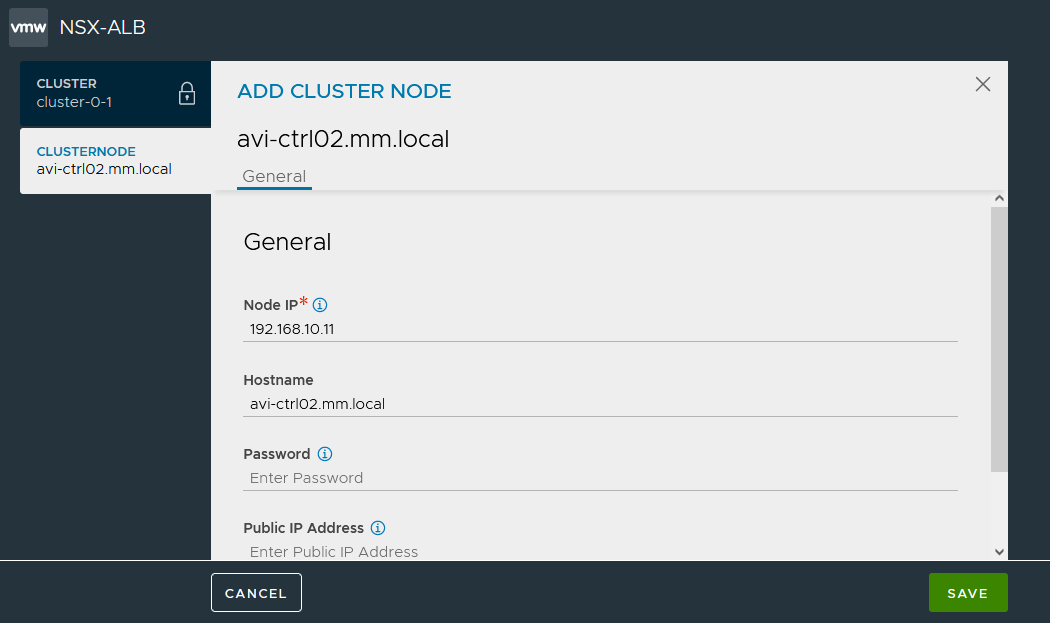
In addition to the first node which was deployed in the first post, we have to deploy two new nodes without performing any post configuration on it.
Note: It is recommended that each Controller should be on the same management network as the Controller that was already installed.
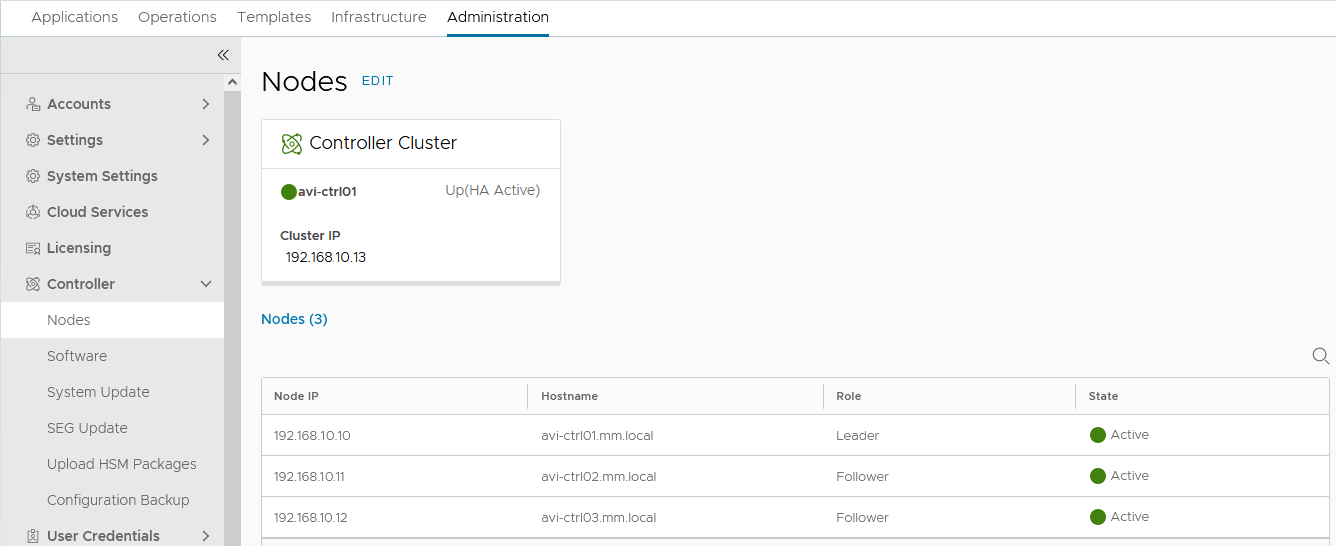
| Controller Node | IP Address | Role |
| avi-ctrl01.mm.local | 192.168.10.10 | Leader |
| avi-ctrl02.mm.local | 192.168.10.11 | Follower |
| avi-ctrl03.mm.local | 192.168.10.12 | Follower |
- From the web browser, open the first controller node that was already deployed (https://avi-ctrl01.mm.local).
On the Administration tab, select Nodes under Controller section and click Edit.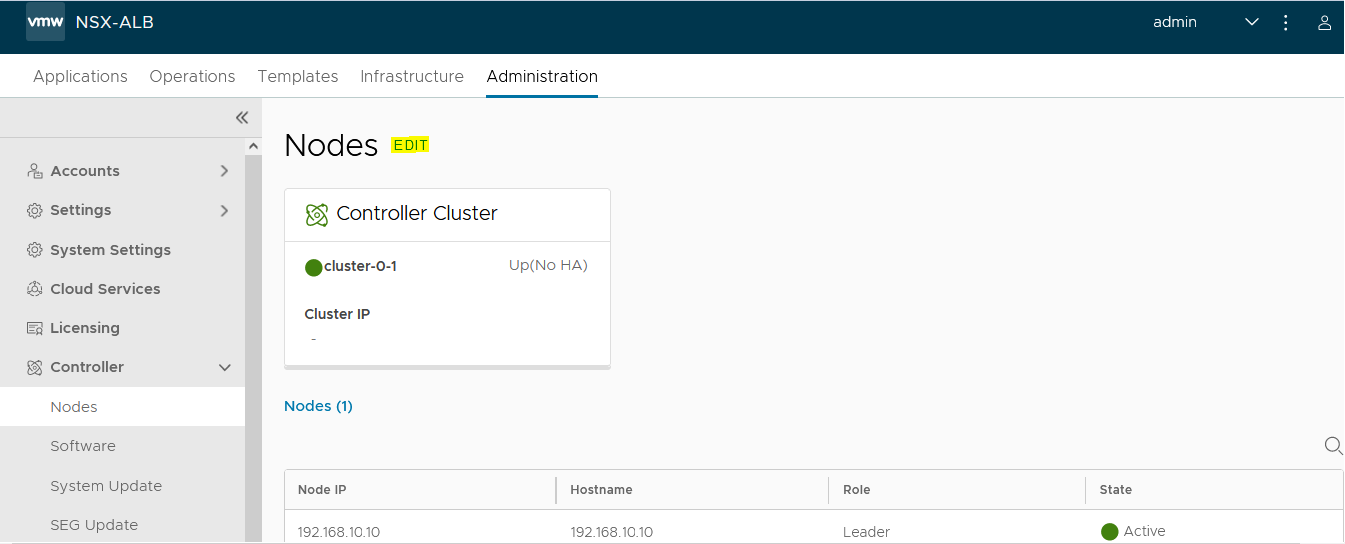
- Change the cluster Name if needed and provide the Controller Cluster IP.
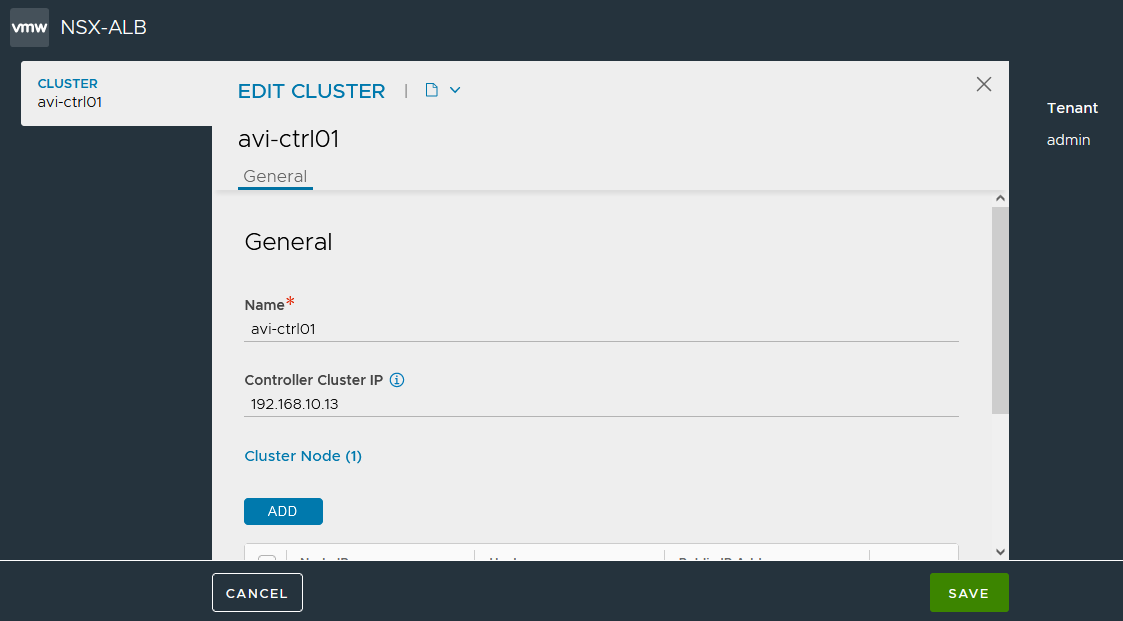
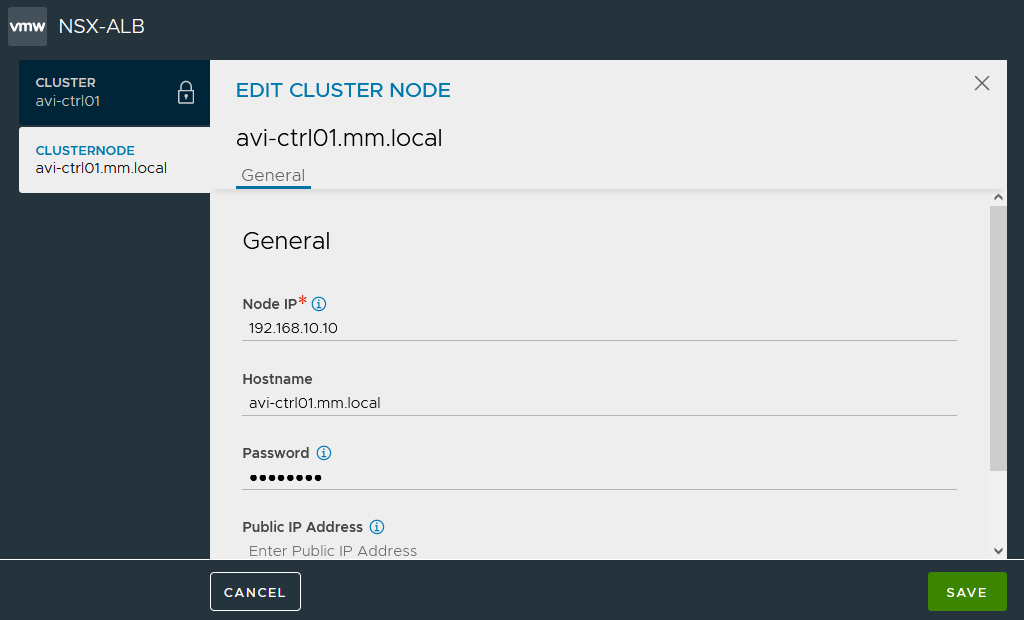
- Under Cluster Node (1), edit the first node and change the Hostname value to the FQDN.

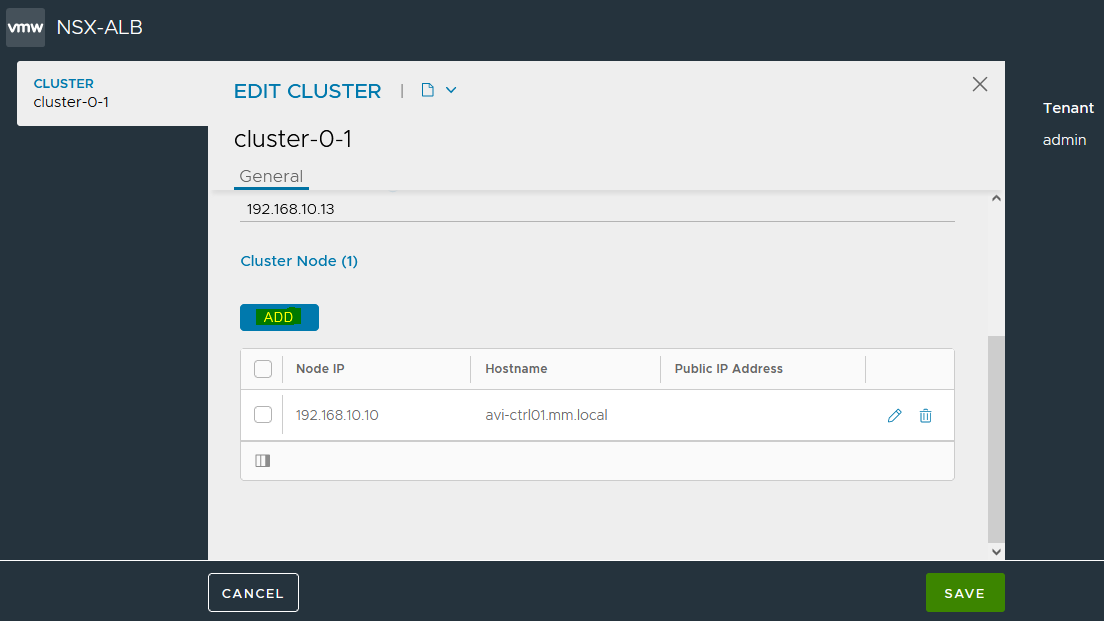
- Under Cluster Node (1), click the ADD button to add the additional two nodes and then click SAVE.

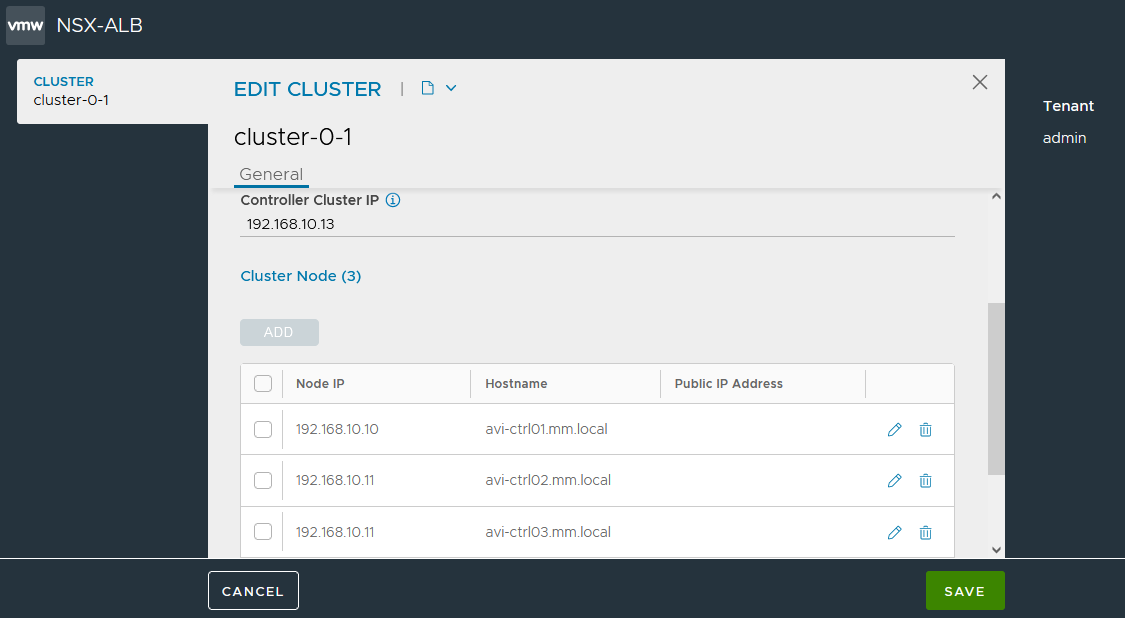
- After these steps, the cluster is created with the first node as the leader and the two other nodes as follower members.
Note: the below error will be received after refreshing the browser, and this is because of the warm reboot which can take 2-3 minutes after creating the cluster.
Backup Configuration
It is highly recommended to configure a periodic backup of the NSX ALB configuration database, which defines all clouds, virtual services, pools, users, and so on.
The supported protocol for backup is SCP and SFTP only, and it is a best practice to store backups in a safe and external location.
In the below steps we will demonstrate how to configure a periodic backup using SSH credentials on SCP Windows server:
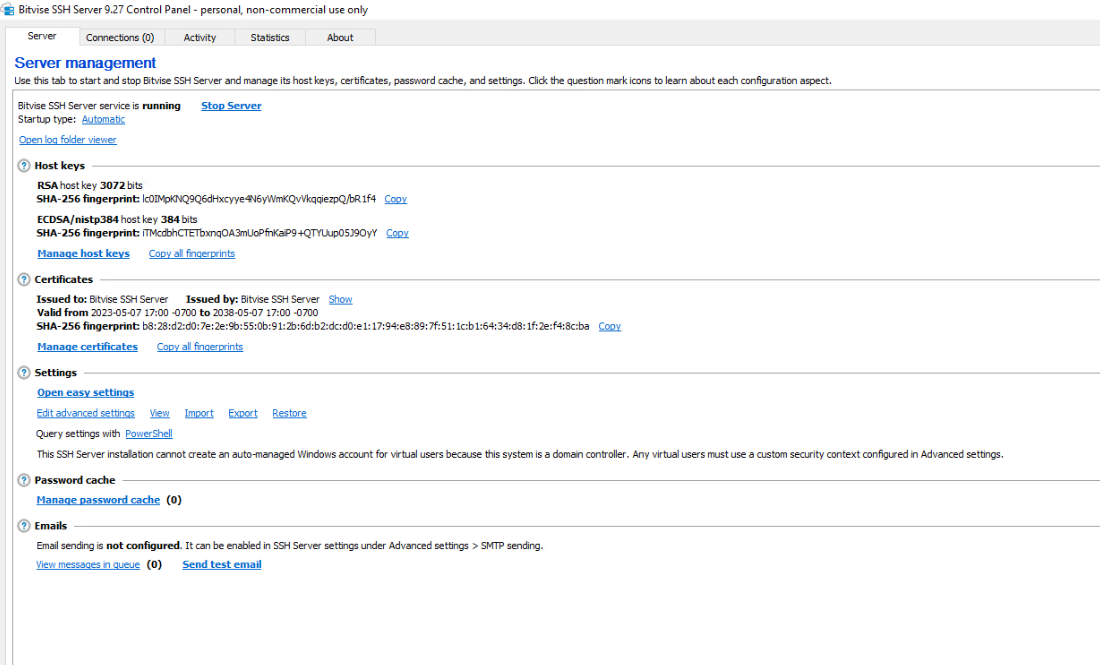
- First I installed Bitvise SSH server on a windows 2016 machine for a primary role as a file transfer server using SFTP,/SCP.
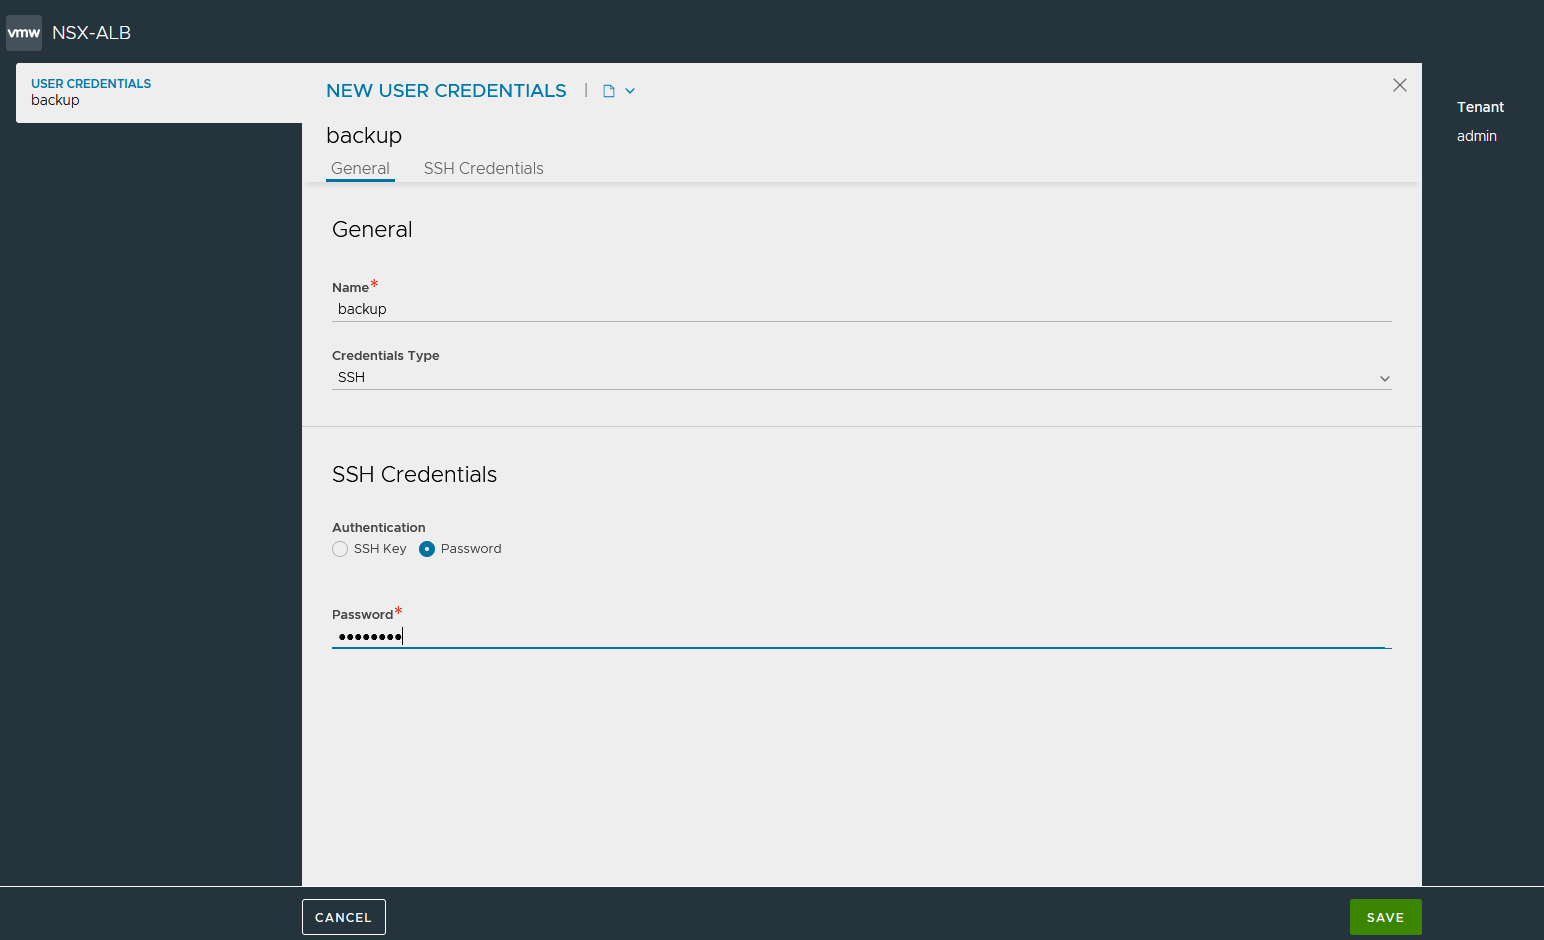
- On the Administration tab, select User Credentials and click Create to create a new SSH user which will be used for backup.

- Enter a Name, select SSH form the Credentials Type dropdown menu, and provide a Password for authentication (SSH key an be used).
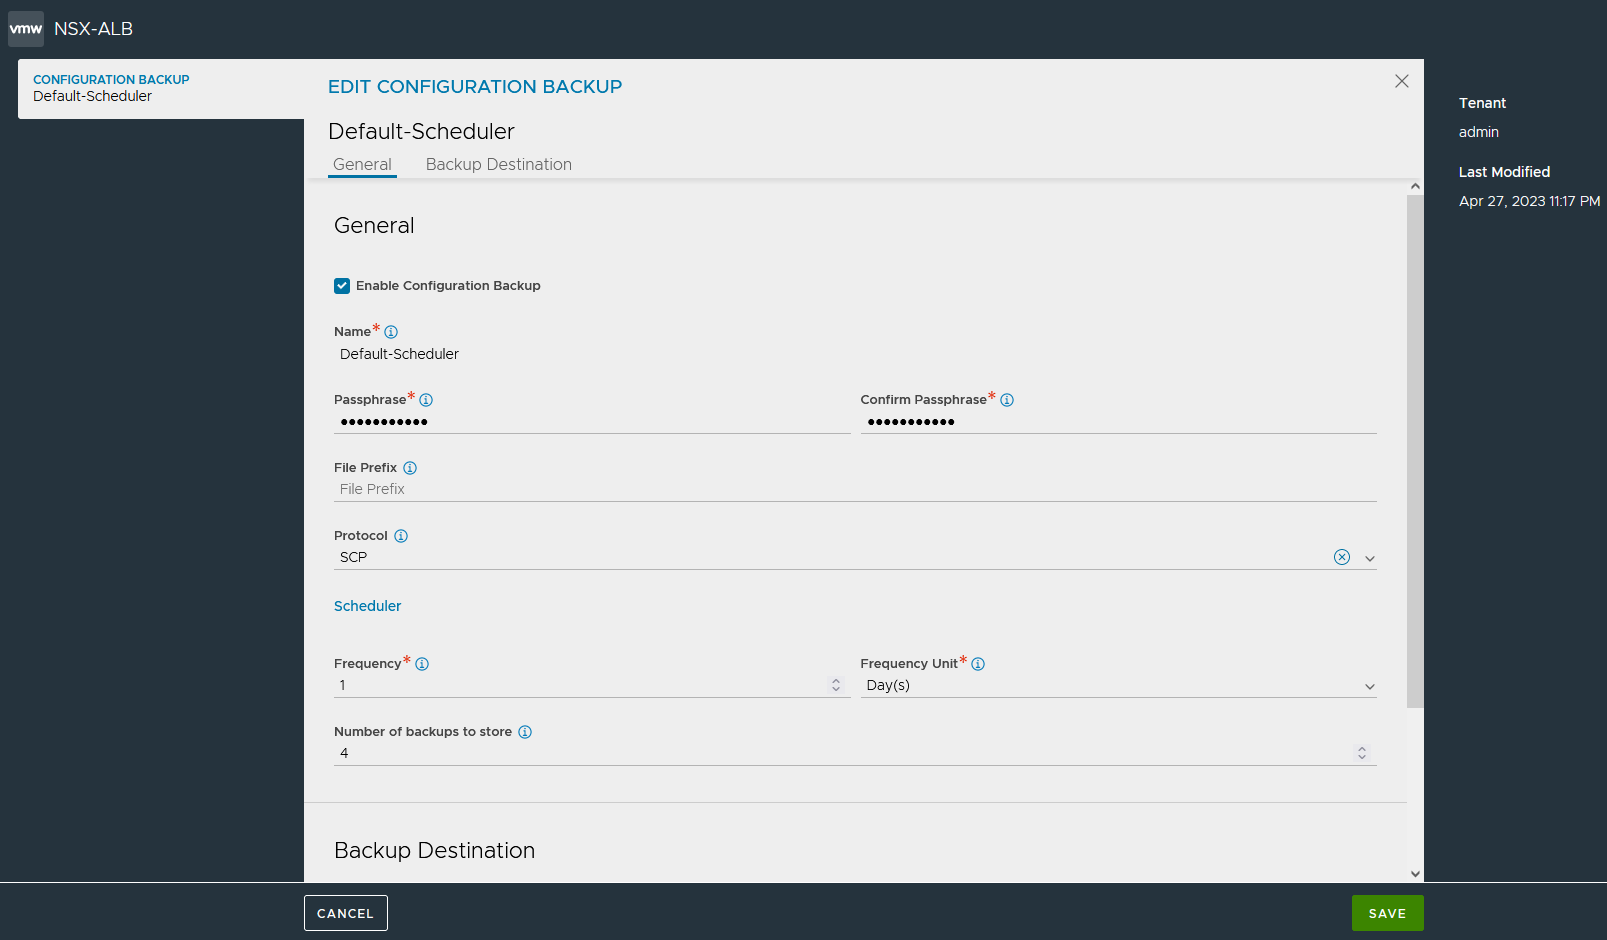
- To configure backup, click Edit on the Configuration Backup.
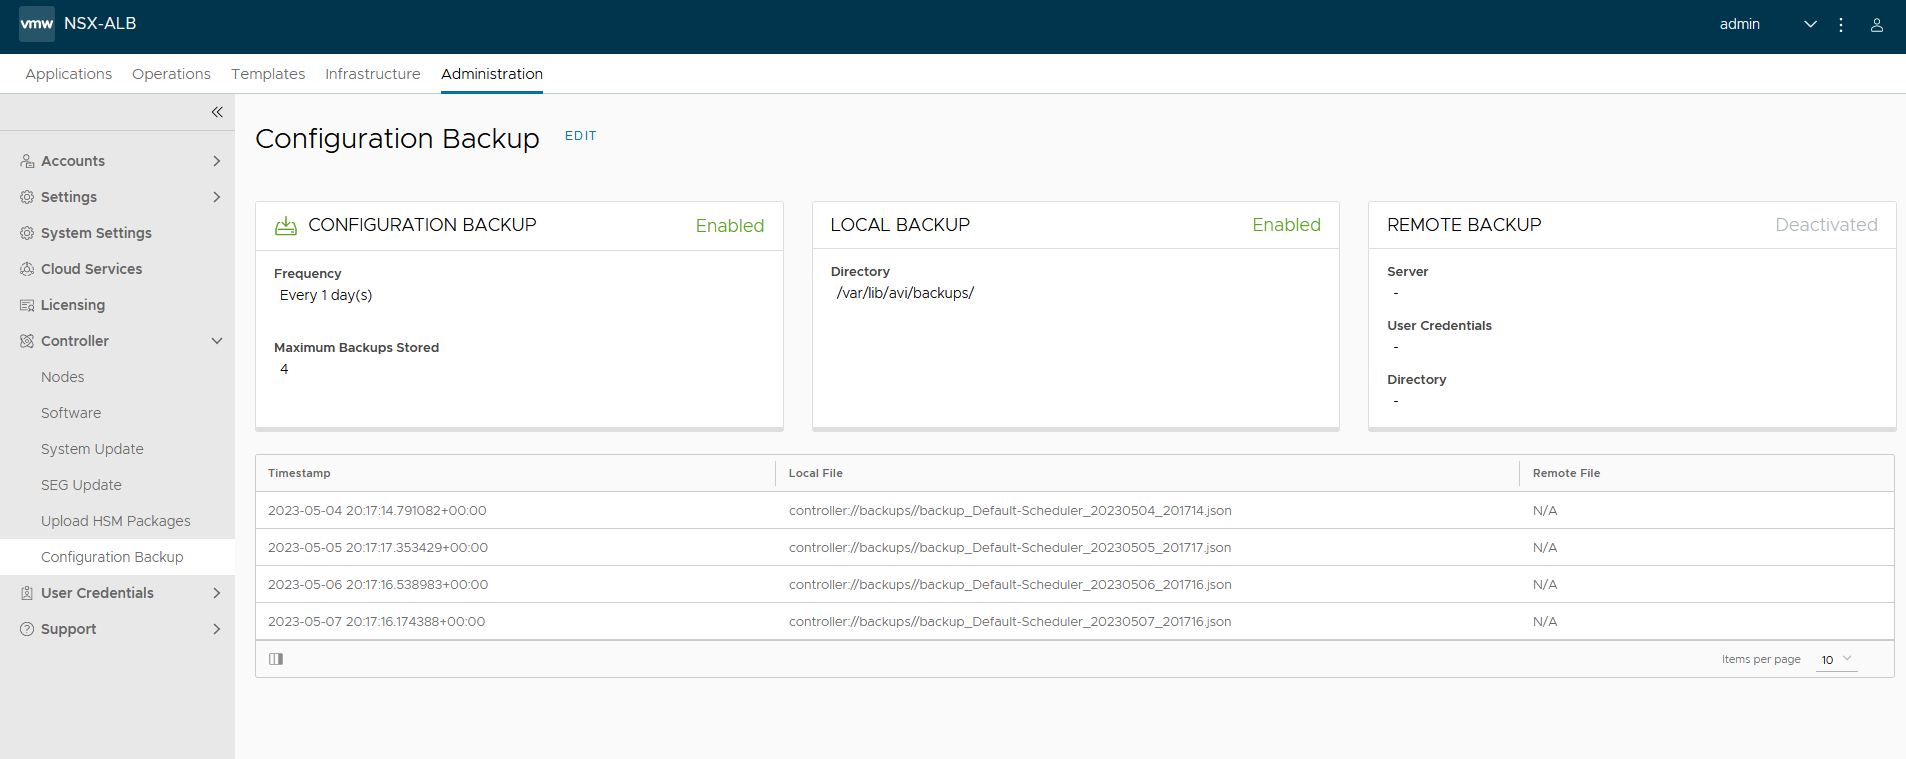
- Select Enable Configuration Backup to schedule backups.
- Enter and confirm a Passphrase, which will be used to encrypt all sensitive fields contained within the backup and during the restore.
- Select the Protocol SCP or SFTP (In my case I’m using SCP).
- Configure the following under Scheduler:
- Frequency: Determine how often backups are to be taken. 0 indicates the backup sequence has no end time. Range 0-60.
- Frequency Unit: By default the Frequency Unit is taken everyday for the backups to occur . Use this field to change the unit to minutes, hours, weeks or months.
- Number of backups to store: Rotate the backup files based on this count number. Range 1-20. The oldest backup is deleted after the most recent backup successfully completes.
- Under Backup Destination:
- Select Enable Local Backups (on Controller), to preserve the number of indicated backups on the Controller.
- Server Address: Enter the FQDN or IP address of your backup server (must be reachable from the Controller)
- Home Directory: Provide a remote destination address with write permissions.
- User Credentials: Select the previously-defined SSH user created in step 2, or click the three dots at the end of the field to Create new user credentials.
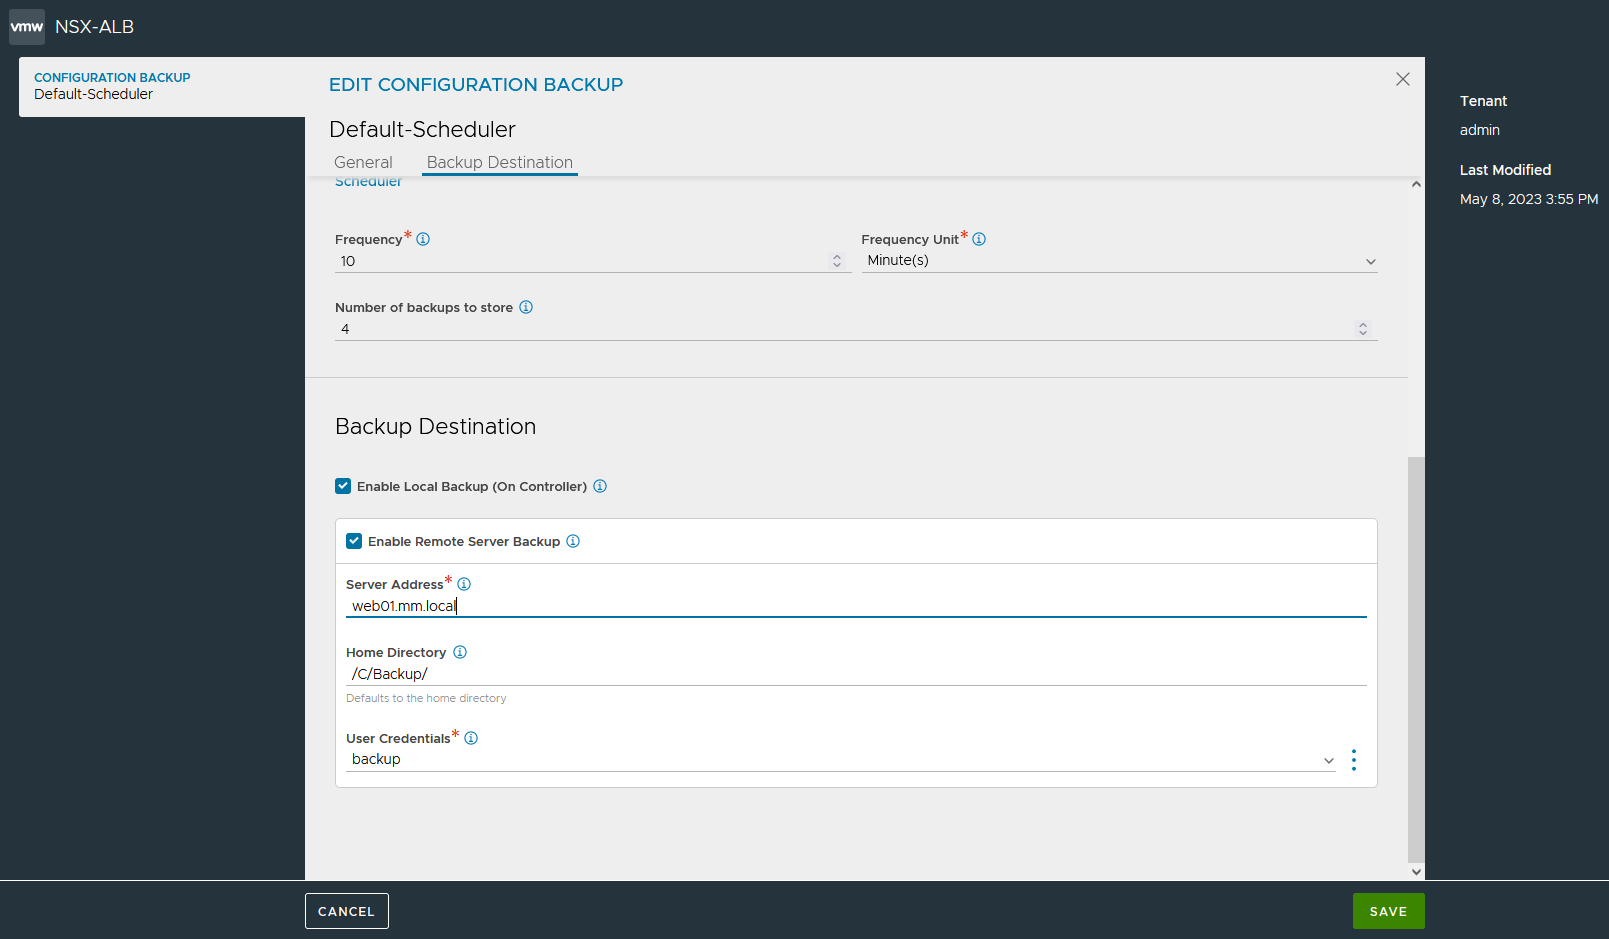
- Click Save to complete the configuration.
- Based on the above configuration, the first backup will be completed after one day from saving the configuration.

![]()

